Perfect Setup for Thriving Indoor Ferns
Ferns are one of those plants that make a space feel instantly more fresh and calming. Their soft, frilly fronds and bright green color add a delicate, jungle-like vibe to any room. I love adding ferns to my indoor collection because they bring so much life into quiet corners of my home. But I’ve also learned that they won’t just settle in anywhere. These green beauties can be a little picky when it comes to their environment. If you’ve ever watched a fern dry out just a week after bringing it home, you know the struggle.
To really help indoor ferns thrive, I’ve had to learn what their environment needs to look and feel like. It isn’t about guessing. It’s about creating just the right balance of light, moisture, and space so the plant can breathe and grow. Whether you're caring for your very first fern or trying to solve why your current one is struggling, getting their home setup right makes all the difference.
Choosing The Right Fern For Indoors
There are a lot of fern types to pick from, but not all are suited for indoor life. Some need more moisture or room than what most homes can offer. I’ve found that the easiest way to narrow it down is to choose varieties that bounce back well and stay adaptable across seasons.

Here are a few indoor faves I always recommend:
- Boston fern: Loves bathrooms or kitchens with higher humidity
- Bird's nest fern: The shiny, wavy leaves curl up in lower light and don’t need much fussing
- Kimberly Queen fern: Stays more upright than floppy and tolerates drier air better
- Lemon button fern: Compact and super cute, great for shelves or small planters
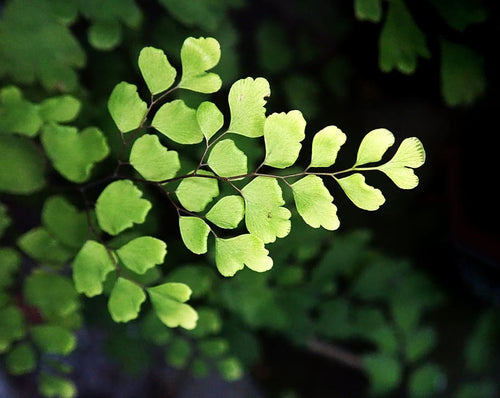
I avoid options like staghorn or maidenhair ferns unless I’m ready to maintain a very specific setup. Those can be more finicky about moisture and light and don’t always adjust well if the humidity drops for a day or two.
When picking a fern, I check my space first. Is there bright, indirect light coming through a window most of the day? Do I have a corner that doesn’t catch much breeze from the AC? Those clues help me match the plant with its new home. I also think about how often I walk past the space. If it’s a high-traffic area, the plant may get bumped or dried out quicker than expected.
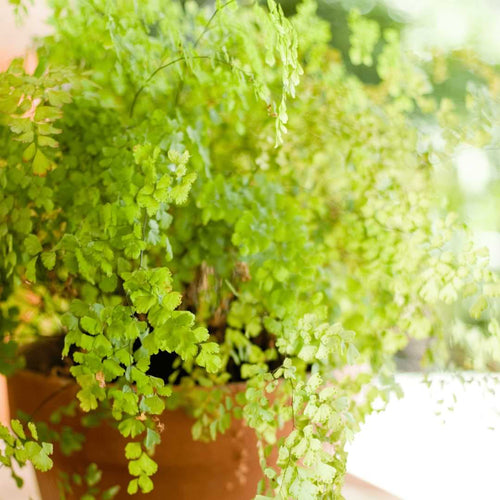
It’s also smart to think about where humidity builds up naturally. Bathrooms with showers, utility sinks, and kitchens tend to hold more moisture in the air. That means less work for you keeping the fern happy. If space is tight or windows are limited, bird’s nest or lemon button ferns make great low-light companions that still give that lush look without needing a greenhouse setup.
Light And Temperature Requirements
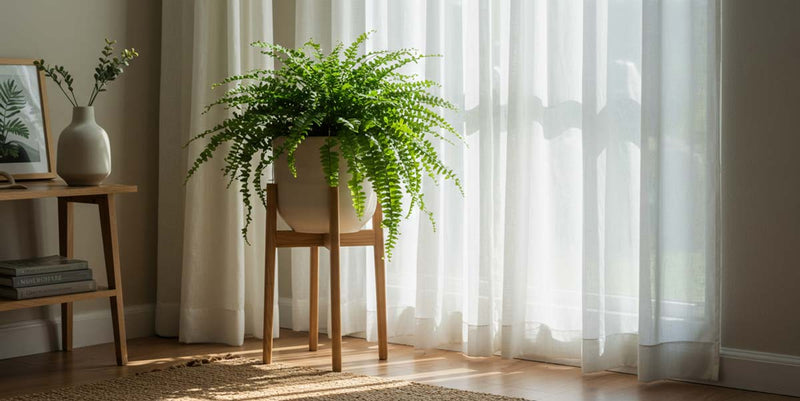
If there's one thing I’ve learned the hard way, it’s that ferns do not like direct sunlight. That midday sun beaming through the window can scorch their delicate leaves within hours. Bright but filtered light keeps them looking their best. I usually place mine near a window with sheer curtains or a few feet back from a bright window where the light is diffused.
In darker areas, they still grow but might slow down or stretch out looking for light. If the leaves turn a very pale green or you see leggy stems with small fronds, it's usually a sign they need more light. On the other hand, crispy tips often mean they're getting zapped by sun or left too close to drafty glass.

When it comes to temperature, most indoor ferns prefer what we already enjoy. Something between 65 and 75 degrees during the day. At night, I try not to let them get much colder than 60 degrees. I learned to keep them away from any cold windows during fall. And once I had one sitting too close to an AC unit, it started getting brown patches within a week. So now, I always double-check for sneaky drafts or heat vents before deciding their final spot.
Ferns are slow adapters. If I move them suddenly from one light level to another, I watch for signs of stress like yellowing or dropping fronds. Now I do this in steps. Just a few hours each day in the new spot so the plant doesn’t freak out.
This part of their care feels a little like fine-tuning a radio. It takes small tweaks to dial into the right light and warmth. But once you find that sweet spot, their leaves perk up and stay full. And when that happens, you’ll know you’ve nailed it.
Humidity And Watering Tips
The trick with ferns is staying as consistent as possible with moisture. If the air is too dry or the soil swings from soggy to bone dry, their fronds start to crisp up or fall away. I’ve had the best luck mimicking the kind of moist forest floor they’re used to—damp but not soaked.
I aim to keep the soil slightly moist, checking with my finger to feel the top inch. If it’s dry, that’s my cue to water. When I do, I make sure to water slowly and evenly around the pot so I don’t just soak the roots in one spot. Then I allow any extra water to drain out of the bottom and never let the pot sit in standing water.

To keep humidity levels steady, especially during colder months or if I’m running the heater, here’s what works for me:
- Place a tray of pebbles and water under the pot since the water evaporates and lifts moisture into the air
- Group plants together to share humidity
- Use a humidifier nearby if the air in your home is very dry
- Mist regularly, especially the underside of the leaves, but only in the morning so moisture has time to dry
One mistake I used to make was guessing when a plant needed water. Now, I rely on feel and routine. During fall, I check a little less often since the plant growth slows. But in warm months, I keep a closer eye. Too much water can lead to root rot, so I stay careful never to let it feel swampy.
Soil And Fertilization Needs
Ferns appreciate soil that stays moist but drains well. If it feels heavy, like clay or compacted after a while, I know it’s time to switch things up. I mix a few things into standard indoor potting mix to get it just right.
Here’s my go-to fern soil blend:
- 2 parts regular indoor potting mix
- 1 part perlite or pumice for drainage
- 1 part coconut coir or peat for moisture retention
That combo keeps the roots aerated while hanging onto enough moisture between waterings. I also avoid soils labeled moisture control since they tend to stay too wet and may suffocate roots.
When it comes to feeding, I treat ferns like any other houseplant. They appreciate a regular boost, but only when actively growing. I typically fertilize about once a month during spring and summer using a balanced liquid houseplant fertilizer diluted to half strength. In fall, I cut back and stop completely in winter.
If you’ve got other plants like pothos or philodendrons, you’ll love that you can use the same fertilizer setup for all of them. Those plants, by the way, are much more forgiving, which makes exploring with houseplant nutrients easier. For any of those three, adding in soil amendments like worm castings, compost, or a little slow-release fertilizer when repotting gives them a strong start without overwhelming the roots.
Troubleshooting Common Fern Problems
Even with the best setup, stuff happens, especially with ferns. They’re sensitive to their environment, so when something’s off, they let you know through their leaves. Whenever things go sideways, I take a deep breath, check the basics like light, water, and temperature, and work through what could be causing the issue.

Here are a few things I’ve run into and how I’ve handled them:
1. Yellowing leaves
Usually means overwatering or poor drainage. I check my pot to make sure roots aren’t staying soggy. If the soil stays wet for more than a day, I repot using a lighter mix.
2. Browning tips or crispy edges
Almost always a humidity issue. I start misting more or move the plant next to a bathroom or humidifier.
3. Droopy or curling leaves
This could go either way—too dry or too wet. I poke my finger in the soil and inspect the roots. If it’s dry and the pot feels light, I water. If it’s wet and droopy, I hold off and check for root rot.
4. Pest problems
Ferns aren’t magnets for pests, but it can happen. I give my plants a close look about once a week, checking under leaves. If I spot anything crawling, I wipe leaves gently and use neem oil.
I always remind myself that ferns are slower to bounce back than something like a pothos. If I prune damaged leaves and fix the issue, new growth will usually come in. I just give it time and stay patient. I don’t overcorrect by trying five things at once.
What Makes Fern Care Totally Worth It
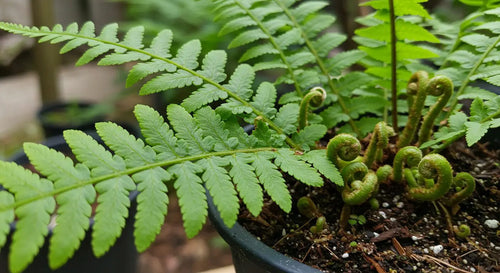
Once I’ve figured out the right combo of light, moisture, and routine care, taking care of ferns becomes almost second nature. I don’t stress if a few leaves go brown. I just keep an eye on the new growth. Healthy ferns grow from the center outward, so when I spot fresh, green fronds coming in, I know it’s on the right track.
I like to check on my ferns a couple times a week. Not always to water, but just to feel the soil, trim anything dying, pick off debris, and look for signs of stress. That regular check-in lets me catch things early so problems don’t spiral.
Once the core setup is dialed in, the upkeep is low-key. I focus on the basics like avoiding drafts, steady watering, and consistent humidity. If I notice a fern slowing down, I tweak my routine. A shift in light or too much dryness in the air can make a big difference for these plants.
And while ferns take some extra thought in the beginning, the payoff is worth it. There’s nothing like waking up to lush, full greenery on a bookshelf or hanging from a plant stand. They really do make the space feel calmer and a little more peaceful. And with a steady care routine, they give back that beauty all year long.
Creating a thriving environment for your ferns doesn’t have to be a daunting task. Once you have the right balance of moisture, light, and temperature, you're on your way to lush greenery year-round. If you’re ready to expand your green thumb and experiment further, try out different methods for fern propagation. We at Houseplant Resource Center are here to help you grow your indoor jungle with ease and confidence.